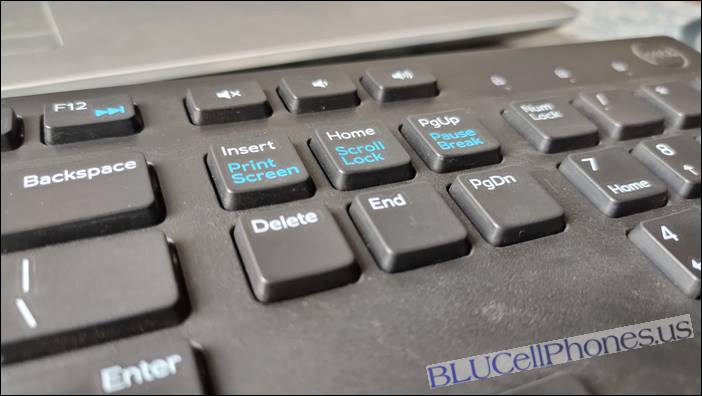
A quick and easy guide on how to take a screenshot on a Windows 11 PC/laptop.
Here comes Microsoft Windows 11 operating system as a successor to Windows 10. We will be going through a lot of guides on Windows 11 especially in the How to Section and here comes the second one after Windows 11 system requirements. I will show you how to take a screenshot on Windows 11 OS.
A screenshot is a useful feature that allows you to showcase a photo proof. It can be an error while gameplay, an achievement in a game, or a software error. This feature of a screenshot is also available on Android phones by default. Let's check out how you can get it on a Windows PC/laptop.
A screenshot can be helpful in various ways like -
- Troubleshooting: When seeking help or support for technical issues/glitches, providing a screenshot of the error can help others understand the problem more effectively. It allows them to see the error message directly, making it easier to diagnose the problem.
- Documentation: A screenshot provides a visual reference to illustrate a particular process or software interface. Like for example in the process of deleting a Textnow Account, I have shown a guide with a process having various screenshots.
- Training and Tutorials (like these)
- Record Keeping
It becomes a quite useful application on the Windows laptop where you work.
How to take a Screenshot on Windows 11
There are several ways through which you can take screenshots on a Windows 11 laptop or PC.
Print Screen:
The Print Screen or Print Screen or Prt Sc key is available on all laptops and keyboards. It's one of the easiest and fastest ways to capture screenshots on a Windows 11 laptop or PC.
Alt + Print Screen:
This copies the active Windows to the clipboard, which can be pasted into another program.
Windows + Shift + S:
Once you press this three-key combination on your laptop, your screen will dim and the mouse pointer will change. You can drag to select a portion of the screen to capture. The screenshot will be copied to the clipboard and can be pasted into another program.
Windows Key + PrntScn:
This saves the entire screen as an image file. You can access it in "Pictures" > "Screenshots".
How to Take Windows 11 Screenshots Using Snipping Tool
An advanced version of taking screenshots on Windows 11 is using the Snipping Tool. You can use this tool to grab a screenshot and save it as an image file.
Here is how to do it -
- Start the Snipping Tool from the Start Menu or Search and open it.
- In the "Mode" dropdown, choose the kind of screenshot shape you want.
- Click on New and your screen will freeze. Now use the mouse to create the screenshot.
If you are running the latest version of Windows 10 then you can press keys Windows + Shift + S to bring up the Snipping tool in compact mode.
So that's how you can take a screenshot on a Windows 11 PC or laptop.
Direct Sharing of Screenshots without Saving Them on your Laptop:
Various web applications and customer support systems support the direct pasting of your captured screenshots, eliminating the need to save them to your device before uploading or sharing.
This feature proves especially helpful when dealing with customer support through chat platforms and would also mean less clutter on your PC and read why it's not good.
The following applications direct pasting of screen capture -
- Google Mail or Gmail
- Yahoo Mail
- Microsoft Paint (Of course it should do it for editing purposes)
- Microsoft Word
- Microsoft Excel
- Google Document
- Google Spreadsheet
- & lot more
Key Takeaways:
- Press Windows + Shift + S and you are good to take a screenshot on a Windows 11 laptop within seconds.
- You can even do this by pressing the PrintScreen or PrntSc button on your keyboard.
- Several Applications support direct pasting of screenshots or screen captured.
This post was published on March 2, 2024 7:21 AM

